Mac screenshots that upload to Google Drive and copy a share link
Last updated: 2026-08-24
macOS saves a screenshot as a file on your Mac and stops there, so sharing it as a link means uploading it somewhere yourself and setting the access by hand afterwards. Emerald Tools is a menu bar app for macOS 14.0 or later that sends the capture straight into a folder in your own Google Drive, applies the link access you picked beforehand, and leaves the share link on your clipboard so the next thing you do is paste.
Screenshots in macOS
- Captures the whole screen, a selected area or a single window, with keyboard shortcuts built in.
- Saves the result as a file — on the Desktop unless you change it — and shows a thumbnail you can mark up or hand to the share sheet.
- Has no destination that uploads the file and hands a link back. Getting a link means saving the file, finding it, and uploading it somewhere yourself.
- Knows nothing about Google Drive. Even with a Drive folder synced on your Mac, the file only becomes a link once you open Drive and change the file’s access by hand.
Screenshots in Emerald Tools
- Uploads the capture into a folder in your own Google Drive, which the app creates the first time it needs it.
- Applies the link access you set once — view, comment, edit, or no sharing at all — to every upload that follows.
- Copies the share link to the clipboard and says so, in a notification and in a card at the corner of the screen.
- Keeps its own shortcuts for full screen, area and window, separate from the macOS ones, so both sets work side by side.
How to save a Mac screenshot to Google Drive and copy the link
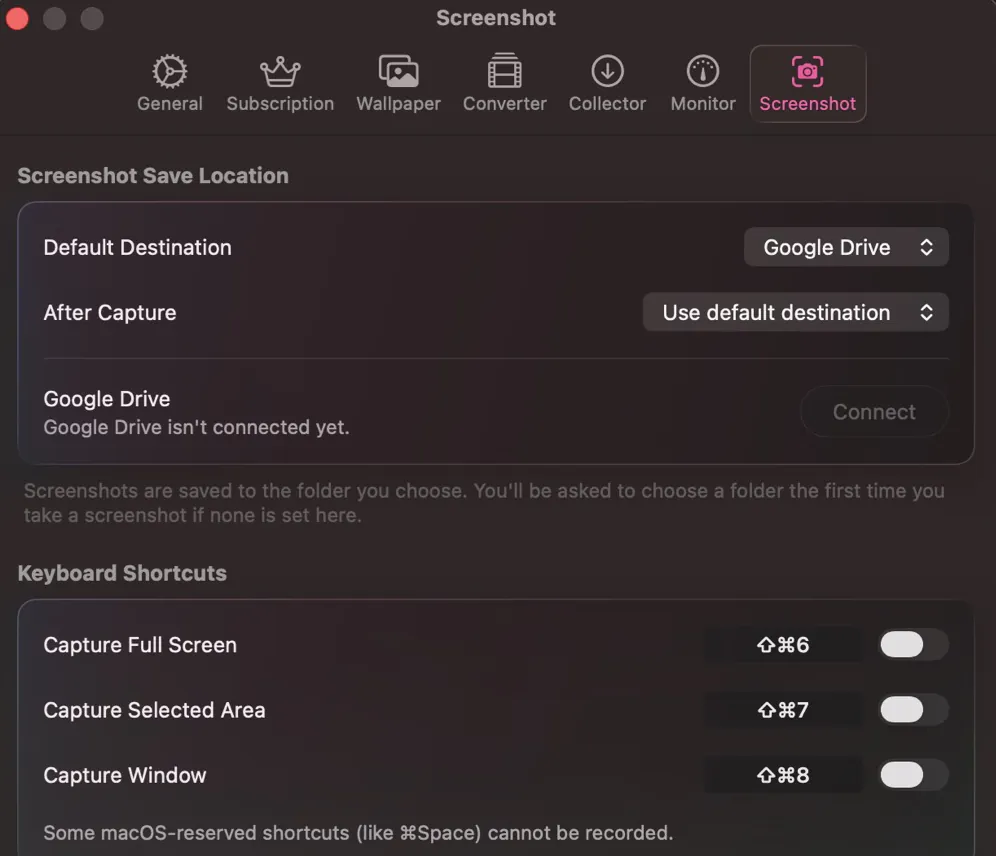
- Point screenshots at Google DriveInstall Emerald Tools from the Mac App Store, click its icon in the menu bar, choose Settings... and open the Screenshot tab. Under Screenshot Save Location, set Default Destination to Google Drive and leave After Capture on Use default destination, so a capture never stops to ask you anything. Until an account is connected, the row underneath reads that Google Drive is not connected yet and offers a Connect button.
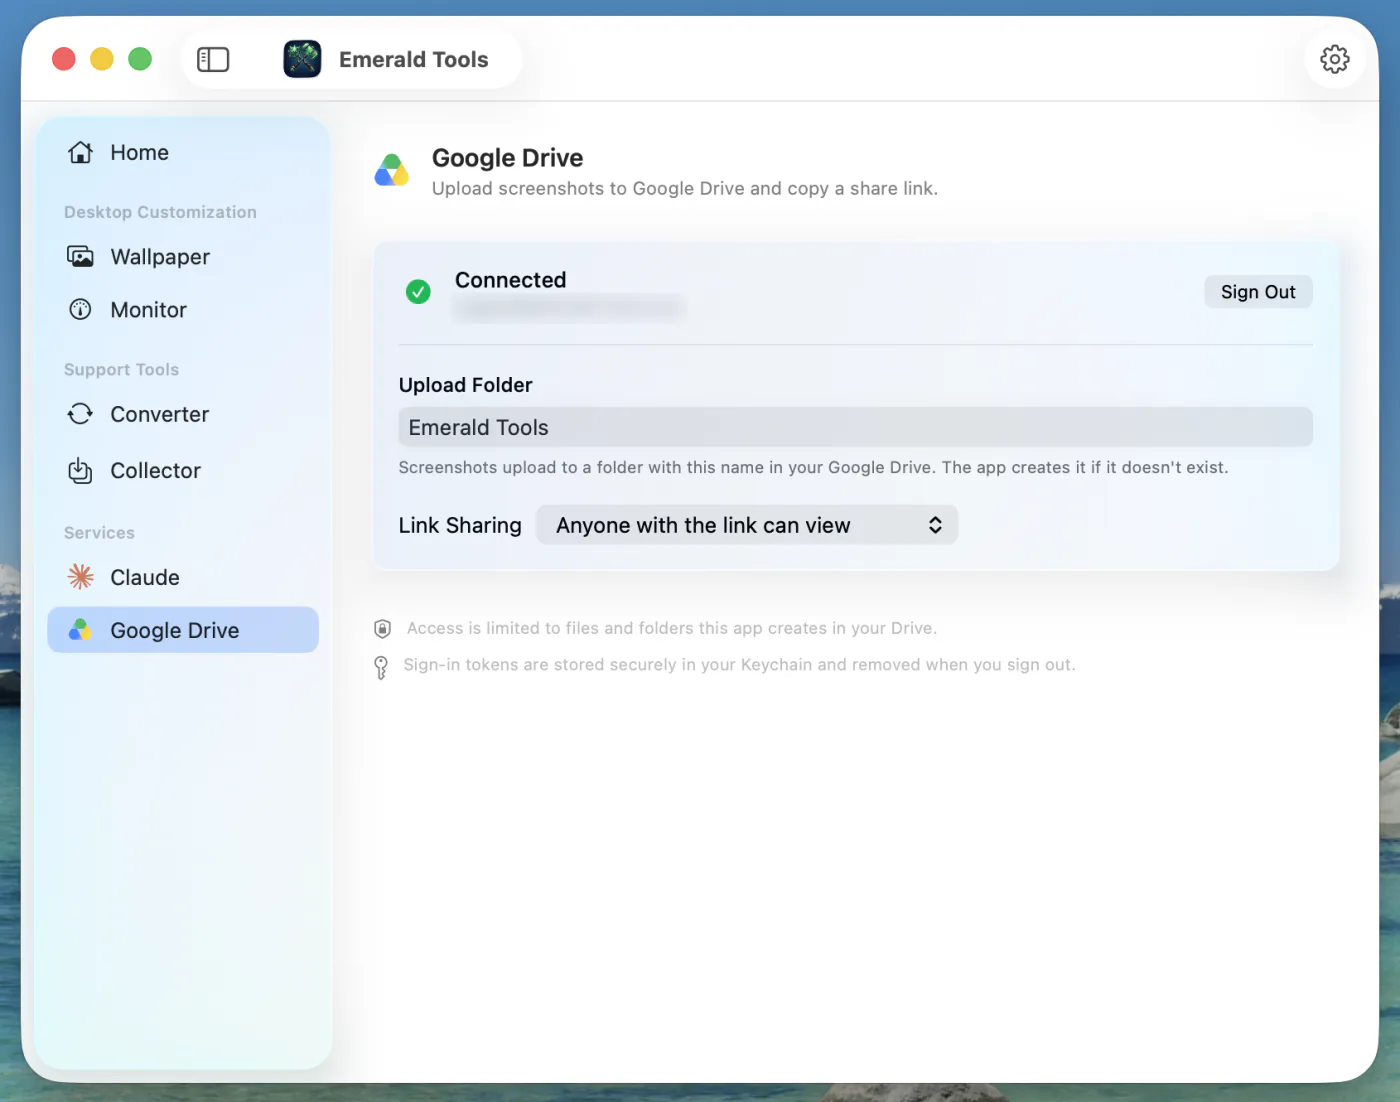
- Connect your Google accountClick Connect. The dashboard opens on its Google Drive page, where signing in grants one scope and no more: drive.file, which limits the app to files and folders it creates itself. The rest of your Drive stays invisible to it. The sign-in tokens are held in your macOS Keychain and deleted when you choose Sign Out.
- Choose the upload folder and who may open the linksTwo settings appear on that page once you are connected. Upload Folder is the name of the Drive folder screenshots go into, and the app creates a folder of that name if one is not there already. Link Sharing is decided in advance rather than per upload, and offers four choices: Don’t share, Anyone with the link can view, Anyone with the link can comment, and Anyone with the link can edit.
- Turn on a keyboard shortcutBack in Settings > Screenshot, the Keyboard Shortcuts section holds one shortcut each for Capture Full Screen, Capture Selected Area and Capture Window, offered as ⇧⌘6, ⇧⌘7 and ⇧⌘8. Each one is off until you switch it on, and switching it on reserves that combination system-wide for as long as Emerald Tools is running. Click a shortcut to record a different combination; if another app already holds it, Emerald Tools tells you rather than taking it.
- Take the screenshotPress the shortcut, or use Capture Full Screen, Capture Area... or Capture Window... in the menu bar popover. Full screen captures the display your pointer is on, area asks you to drag out a rectangle, and window lets you pick from the windows currently on screen. Esc backs out of any of them. The pointer is never in the picture, and neither are the wallpaper, overlay and widget windows Emerald Tools draws itself.
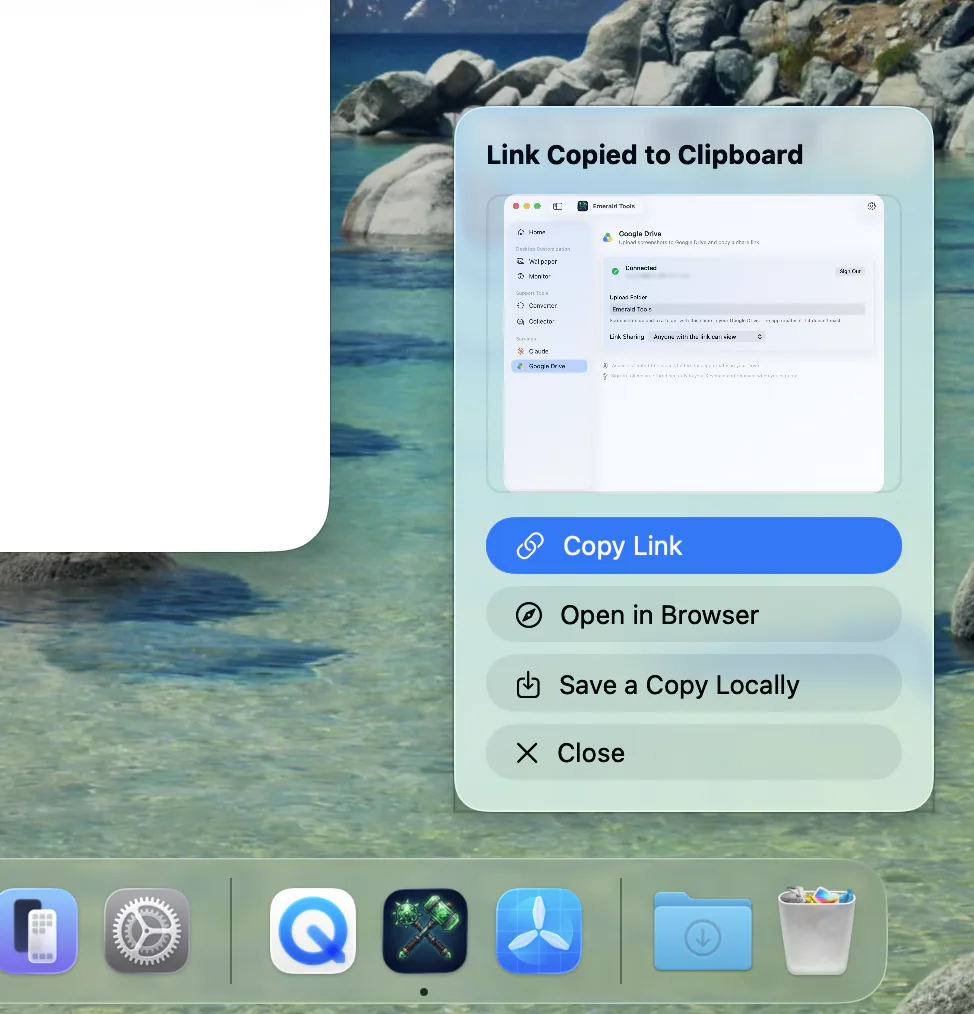
- Paste the linkThe capture uploads as a PNG, the link access you chose is applied to it, and the share link lands on your clipboard: a notification and a card in the corner of the screen both report that the link was copied. The card also offers Copy Link, Open in Browser and Save a Copy Locally, and clears itself after five seconds unless you keep the pointer on it.
Why a screenshot is not a link
The screenshot tools in macOS are good at the capture and indifferent to what happens next. You press a shortcut, you get a file, and the file sits in a folder. That is the right design for a screenshot you are about to paste into a document, and the wrong one for the far more common case: someone is waiting on the other end of a chat window, and what they need is a URL.
Closing that gap by hand takes half a dozen steps every time — save the shot, find it in the Finder, open Drive in a browser, upload, wait, change the file’s access from restricted to anyone-with-the-link, copy the link. None of them is difficult. The problem is that all of them stand between noticing something on your screen and telling somebody about it, and they repeat unchanged every single time.
Emerald Tools moves that sequence to the moment you set it up. The destination, the folder and the access level are decided once, in two places you never have to revisit, and every capture afterwards ends with a link already on the clipboard.
What the app can and cannot see in your Drive
Emerald Tools asks Google for one scope: drive.file. It is the narrowest scope Drive has, and it means the app can only touch files and folders that it created itself. Your existing documents, your other folders and any shared drives you belong to are not merely off-limits — they are invisible to it, because the API does not return them.
Two consequences follow, and both are worth knowing before you start.
- The upload folder is the app’s own. When it looks for a folder by name, it can only find one it made earlier. Rename that folder in Drive, or move it to the trash, and the next upload quietly creates a new folder under the current name rather than failing.
- Nothing passes through a server of ours. There is no developer-operated server anywhere in this feature; the file goes from your Mac to Google, and the link comes back the same way. The OAuth tokens that authorise it are stored in your macOS Keychain, and Sign Out deletes them. You can also revoke the app’s access from your Google Account permissions page at any time, independently of the app.
The uploaded screenshots are in your own Drive, under your own account, and stay under your control after the app has finished with them — including their sharing, which you can change or withdraw in Drive itself.
Set once, then forget: what each setting decides
Four settings shape every capture that follows. They live in two windows, which is worth spelling out because the split is not obvious: where a capture goes is in Settings, and what happens in Drive is in the dashboard.
| Setting | Where | What it decides |
|---|---|---|
| Default Destination | Settings > Screenshot | Whether a capture goes to your local folder or to Google Drive |
| After Capture | Settings > Screenshot | Whether the capture goes straight to that destination, or asks each time |
| Upload Folder | Dashboard > Google Drive | The name of the Drive folder uploads go into |
| Link Sharing | Dashboard > Google Drive | Who can open the link: nobody, viewers, commenters, or editors |
Link Sharing is a standing decision, not a prompt. There is no dialog after a capture asking how widely to share it — the role you chose is applied to every upload, which is what makes the whole thing finish in one keystroke. If some screenshots need different treatment, the honest way to handle it is to change the setting for that batch, or to share those from Drive yourself.
After Capture is the escape hatch. Set it to Ask each time and every capture pauses on a card offering the local folder or Google Drive, so a Mac that mostly saves locally can still send the occasional shot out as a link without changing the default.
When it does not go to plan
Failure paths are the part of a screenshot tool people meet at the worst possible moment, so they are worth describing plainly.
- Screen Recording permission is missing. Nothing can be captured without it. macOS asks the first time; if it was declined once, macOS will not ask again, so Emerald Tools shows its own alert with a button that opens the right pane of System Settings. Grant it there and restart the app.
- Google Drive is not connected but is the default destination. Instead of capturing into nowhere, the app says so before the capture and offers to open the Google Drive settings.
- The upload fails. The capture is held in memory, not thrown away. The failure card offers Retry, and Save a Copy Locally so the shot survives as a file even if Drive is unavailable.
- The upload succeeds but sharing does not. This is the case worth knowing about, because it looks like success: the file is in Drive and the link is on your clipboard, but the link opens only for you. Emerald Tools says so explicitly rather than letting you paste a link that will fail for the recipient. Organisational Drive policies that forbid anyone-with-link sharing are the usual cause.
- A shortcut does nothing. Shortcuts are off until enabled, and one that another app already holds is refused when you record it, with a message saying so. Both states are visible in Settings > Screenshot > Keyboard Shortcuts.
Specifications and limits
Everything below is the behaviour of the current release, not a plan.
- Capture modes: full screen, selected area, single window.
- Full screen captures the display the pointer is on, at that display’s own resolution.
- Window capture offers the ordinary application windows currently on screen; the desktop, the Dock and menu bar items are not selectable.
- Excluded from every capture: the pointer, and the wallpaper, overlay and widget windows Emerald Tools draws itself — so a screenshot of your desktop does not photograph the app’s own layers.
- File format: PNG, both locally and on Drive.
- File name:
Emerald Tools Screenshot, then the date and time — for exampleEmerald Tools Screenshot 2026-08-23 at 15.30.12.png. - Default shortcuts: ⇧⌘6 full screen, ⇧⌘7 selected area, ⇧⌘8 window. All three are off until you enable them, and any of them can be re-recorded.
- Link access: don’t share, view, comment, or edit — chosen in advance, applied to every upload.
- Expiring links: not available, a Google Drive limitation.
- OAuth scope:
drive.fileonly. - Token storage: macOS Keychain, deleted on Sign Out.
- Post-capture card: appears at the corner of the display the pointer is on and clears after five seconds; hovering it stops the countdown.
- Permissions used: Screen Recording for the capture, Notifications for the save and link-copied messages.
- System requirement: macOS 14.0 (Sonoma) or later.
The capture is confirmed before the upload finishes. A Drive upload takes a few seconds, which is long enough to wonder whether the shortcut worked at all. Emerald Tools plays the same shutter sound macOS uses and shows the capture straight away on a card marked as uploading, so the wait happens with the shot visible rather than in silence.
Frequently asked questions
Can macOS upload a screenshot and give me a link on its own?
No. The screenshot tools built into macOS write a file to a location on your Mac and stop there, and none of the destinations they offer returns a shareable URL. To turn a screenshot into a link you upload it to a service yourself and set the file’s access there, which is the part Emerald Tools does for you.
Where do the screenshots end up in my Google Drive?
In a folder named by the Upload Folder setting, which the app looks for and creates if it is missing. Because the app holds the drive.file scope, it can only find the folder it created itself, so renaming or moving that folder in Drive simply makes the next upload create a fresh one under the current name. Leave the name blank and uploads go to the root of My Drive instead.
Who can open a link to an uploaded screenshot?
Whoever you decided in advance, in the Link Sharing setting. Anyone with the link can view is the default, and the other choices are comment, edit, and not sharing at all — in which case the file is uploaded and stays private to your account. The setting applies to every upload; there is no per-screenshot prompt.
Can a shared link be given an expiry date?
No — Google Drive does not offer expiring links for this kind of file, so neither does Emerald Tools. Access ends when you change or remove the file’s sharing in Google Drive, or when you delete the file, both of which you do in Drive itself because the screenshots are in your own account.
What happens if the sharing permission cannot be granted?
The upload still succeeds and the link is still copied. When your organization’s Drive policy forbids anyone-with-link sharing, for instance, Emerald Tools reports that sharing could not be enabled and that the link currently opens only for your own account, rather than pretending the link is shareable.
Can I keep saving to a local folder and use Drive only sometimes?
Yes. Set After Capture to Ask each time, and every capture shows a card asking whether to save it to your local folder or to Google Drive. Left on Use default destination it never asks, and the Default Destination setting decides.
What can Emerald Tools see in my Google Drive?
Only what it puts there. The single OAuth scope it requests is drive.file, which grants access to files and folders the app itself created — existing files, folders and shared drives are not visible to it. Nothing is sent to the developer, who runs no servers; the upload goes from your Mac to your own Drive.
What happens when an upload fails?
The capture is kept rather than discarded. The card that reports the failure offers Retry, and Save a Copy Locally so the shot survives as a file, and when the cause is that Google Drive is not connected it offers to open the Google Drive settings instead of retrying into the same error.
Do the shortcuts clash with the macOS screenshot shortcuts?
Not by default: Emerald Tools proposes ⇧⌘6, ⇧⌘7 and ⇧⌘8, while the macOS shortcuts are ⇧⌘3, ⇧⌘4 and ⇧⌘5, so both sets can be enabled at once. If you record a combination another app already holds, Emerald Tools says the shortcut is already in use and leaves it alone. A few combinations reserved by macOS, such as ⌘Space, cannot be recorded at all.
What do I need to run Emerald Tools?
A Mac running macOS 14.0 (Sonoma) or later, and the Screen Recording permission, which macOS asks for the first time you capture anything. A Google account is needed only for the Drive destination — the local folder destination works without one. Emerald Tools is a subscription app with a 14-day free trial, and the App Store listing shows the current terms for your region.
Get Emerald Tools for macOS
Screenshots with Google Drive sharing are one of the five tools in Emerald Tools, alongside multi-display live wallpapers, system monitor widgets, a web media collector, and a WebP to MP4 converter. It lives in the menu bar and stays out of your Dock.